
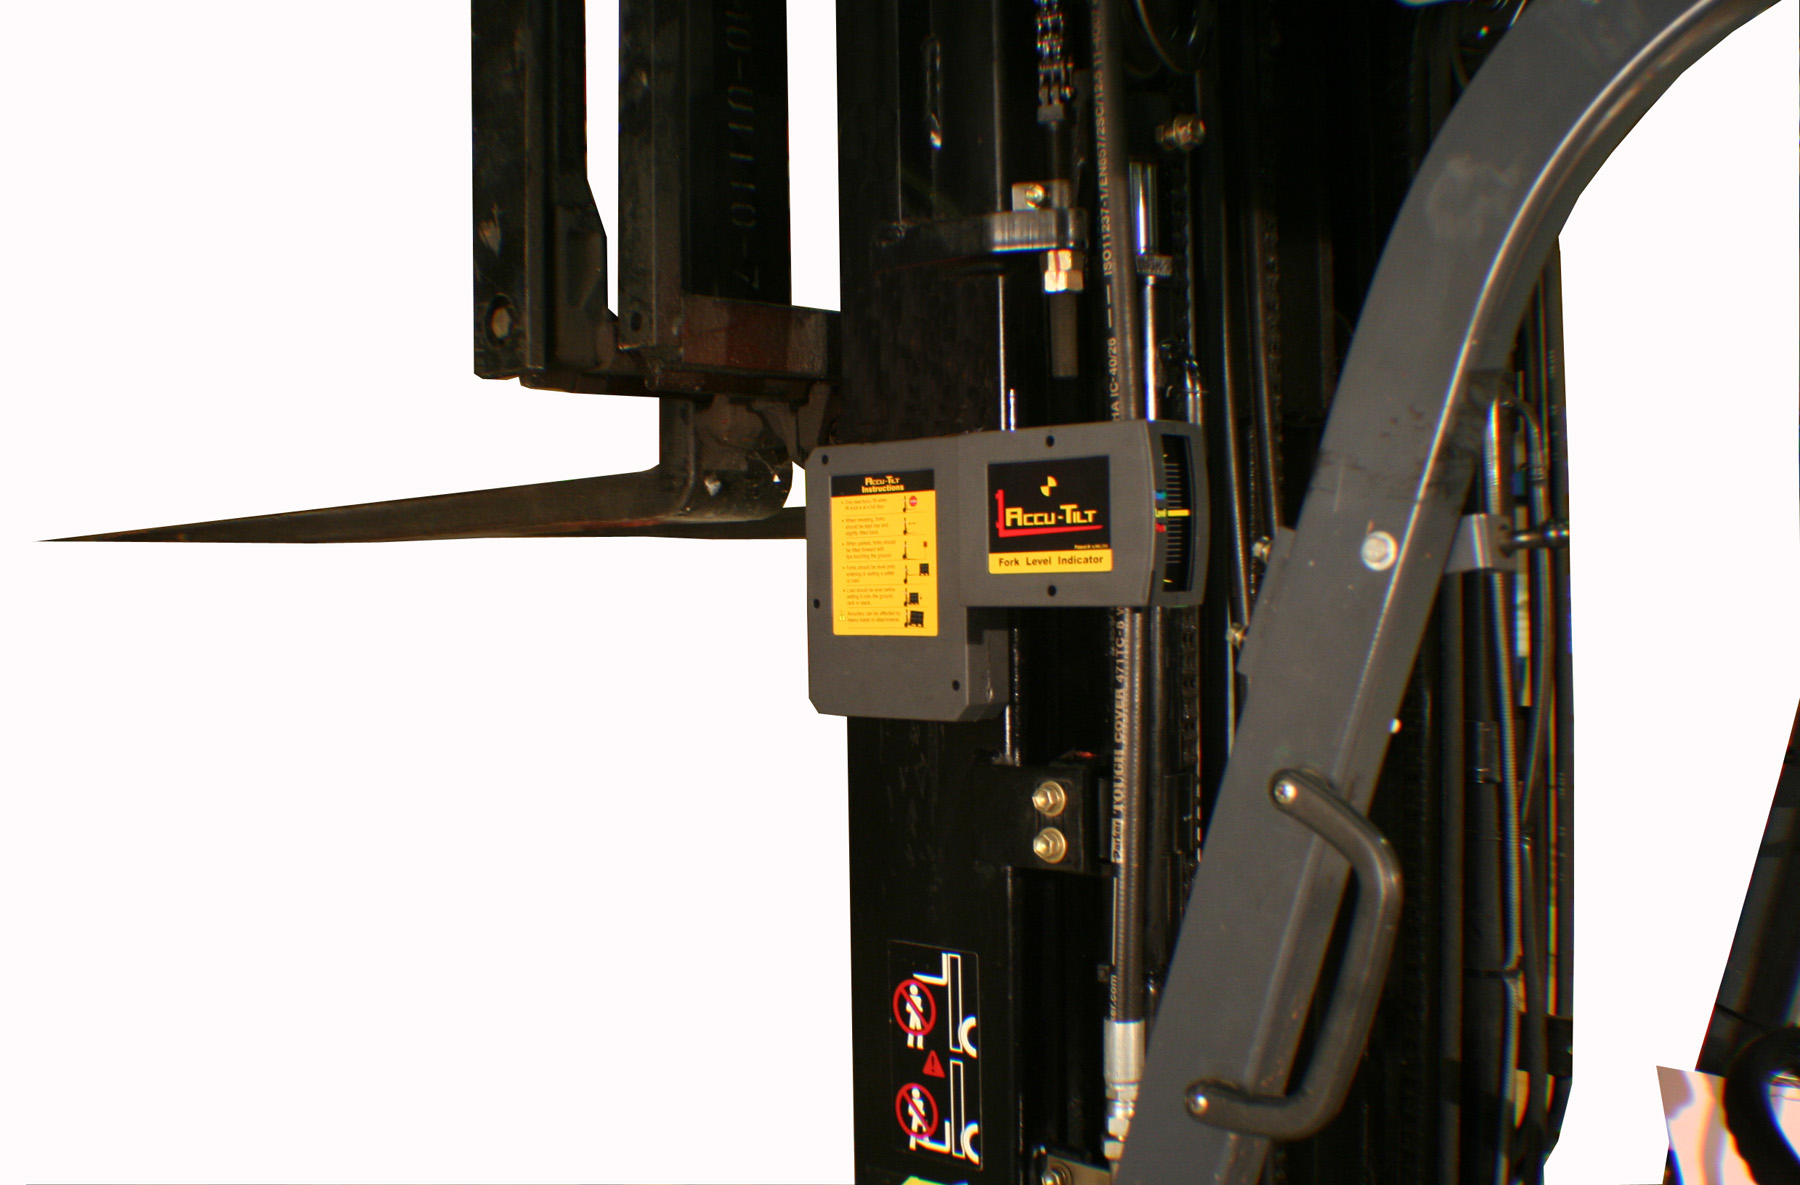
where is the frame level indicator found on a forklift
The frame level indicator on a forklift is typically mounted on the overhead guard or dash panel, right in the operator’s line of sight, and it shows the tilt angle of the mast relative to the chassis. This small but vital gauge helps operators keep loads balanced and stable, especially when working on uneven surfaces or ramps. Understanding its location and function is essential for safe, efficient material handling operations.
Why the Frame Level Indicator Matters for Forklift Safety
The frame level indicator, sometimes called a mast tilt indicator, is a real-time visual reference that tells the operator whether the forklift’s mast is (vertical) or tilted forward or backward. It works in conjunction with the hydraulic tilt cylinders that control mast movement. When the mast is not level, the load can shift, causing tip-overs or dropped loads—two of the most common forklift accidents. By checking this gauge before lifting, traveling, or stacking, operators can prevent dangerous situations and extend the life of the truck’s tires, steer axle, and mast assembly.
Primary Locations of the Frame Level Indicator
1. On the Overhead Guard (Most Common)
On most counterbalanced forklifts, the indicator is attached to the front overhead guard pillar, angled toward the operator. This placement ensures that the gauge is visible without requiring the operator to look away from the load path. The indicator is usually a small circular dial with a bubble or needle that moves as the mast tilts.
2. On the Dash Panel / Instrument Cluster
Some modern forklifts, especially those with digital displays, integrate the frame level indicator into the dash panel next to other telemetry such as lift height, weight, and battery charge. This is common on lithium-ion models like the Liftron DL SERIES, which offers an ergonomic digital interface that includes a mast angle readout. On these units, the indicator is often a horizontal bar graph or a numerical angle display.
3. On the Steering Column or Cowl
In older or compact models, the indicator may be mounted directly behind the steering wheel on the steering column cowl. This keeps it within a 30-degree cone of vision, minimizing head movement. However, this placement can sometimes be partially obscured by the operator’s hands or gloves.
How to Read the Frame Level Indicator
Most indicators use a simple bubble-in-glass tube (similar to a carpenter’s level) that shows when the mast is perfectly vertical (bubble centered) or how many degrees it is tilted. Digital versions show numeric values like “+3°” (forward tilt) or “-2°” (backward tilt). A standard rule of thumb is to keep the mast tilted backward (typically 5–8 degrees) when traveling with a load, and vertical (0 degrees) when stacking or picking. The indicator helps you achieve these precise positions without relying on feel alone.
Regulatory and Training Requirements
OSHA and ANSI standards (specifically ANSI/ITSDF B56.1) mandate that forklifts have a load rating plate and that operators be trained on all controls and instruments, including the frame level indicator. During certification training, instructors emphasize checking this gauge before and during all lifting activities. Failure to maintain proper mast tilt is a leading cause of tip-over incidents, which account for nearly 24% of all forklift-related fatalities.
Common Issues and Maintenance of the Indicator
- Bubble sticking: Dirt or moisture can cause the bubble to stick, giving false readings. Clean the glass with a soft cloth regularly.
- Cracked lens: Impacts from debris or overhead loads can crack the lens. Replace the unit immediately—even a small crack distorts the reading.
- Loose mounting: Vibration can loosen the bracket, causing the indicator to tilt itself. Check bolts during daily pre-shift inspections.
- Digital calibration errors: On advanced models like the Liftron DL SERIES, recalibrate the angle sensor after any mast cylinder replacement or major service.
Comparison Table: Indicator Placement by Forklift Type
| Forklift Type | Most Common Locations | Visibility Notes |
|---|---|---|
| Counterbalance (IC Engine) | Overhead guard pillar | Excellent, but can be dirty on outdoor units |
| Electric 3-Wheel | Dash panel | Good, but may be lower due to compact dash |
| Reach Truck / Narrow Aisle | Steering column cowl | Moderate—often small analog gauge |
| Rough Terrain | Overhead guard, higher position | Essential for slope work |
| Lithium-Ion Modern (e.g., Liftron Material Handling models) | Integrated digital display in dash | Highly precise, includes audible alerts |
Tips for Operators: Using the Indicator Effectively
Before Starting Work
Visually inspect the indicator for damage. While the engine is idling, tilt the mast fully forward and backward and confirm the gauge responds smoothly from one extreme to the other without sticking. If you notice a lag, report it to maintenance immediately.
During Operation
When carrying a load on a ramp, always tilt the mast backward enough to secure the load against the backrest. The indicator helps you avoid over-tilting, which can cause the load to strike the overhead guard. On uneven surfaces, make micro-adjustments using the tilt lever and verify with the indicator.
Post-Shift Checks
Wipe the indicator clean and note any fluid leaks near the tilt cylinders that could affect hydraulic pressure and, in turn, the indicator’s accuracy.
Why Investing in a Quality Forklift Improves Indicator Accuracy
Not all frame level indicators are created equal. Budget forklifts often use cheap mechanical bubble levels that lose calibration quickly. Premium suppliers like Liftron Material Handling fit their trucks with industrial-grade sensors that have a tolerance of ±0.5 degrees, ensuring that your load’s center of gravity stays within the stability triangle. The Liftron DL SERIES takes this further by integrating the indicator with the truck’s CAN-bus system, which can automatically limit forward tilt speed when the angle exceeds safe parameters—something mechanical gauges cannot do.
Final Location Summary
In short, the frame level indicator is almost always found in one of three places: on the overhead guard pillar (easiest to spot), on the dash panel (common on digital models), or on the steering column cowl (older models). If you are operating a forklift and cannot immediately see the indicator, stop and locate it before proceeding with any lift operation. Forklift operators should treat this gauge with the same importance as the fuel gauge or battery meter—it is not an optional accessory but a safety-critical instrument. For fleet managers, ensuring that every truck’s indicator is clean, calibrated, and unobstructed is part of a proactive safety culture that reduces downtime and accident rates.
Remember: when in doubt, check the frame level indicator. It takes less than one second of eye movement and could prevent a costly—or fatal—overturn. Always pair the visual check with stable driving habits, proper load centering, and regular maintenance visits. Whether you operate an older internal combustion model or a cutting-edge lithium-ion unit, knowing exactly where this indicator lives on your specific truck and how to read it accurately will make you a safer, more productive operator. For new buyers, prioritize forklifts with high-visibility gauges and digital readouts as offered by Liftron Material Handling’s lineup, ensuring your team always has the most reliable mast angle data at their fingertips.
Add a review
Your email address will not be published. Required fields are marked *