
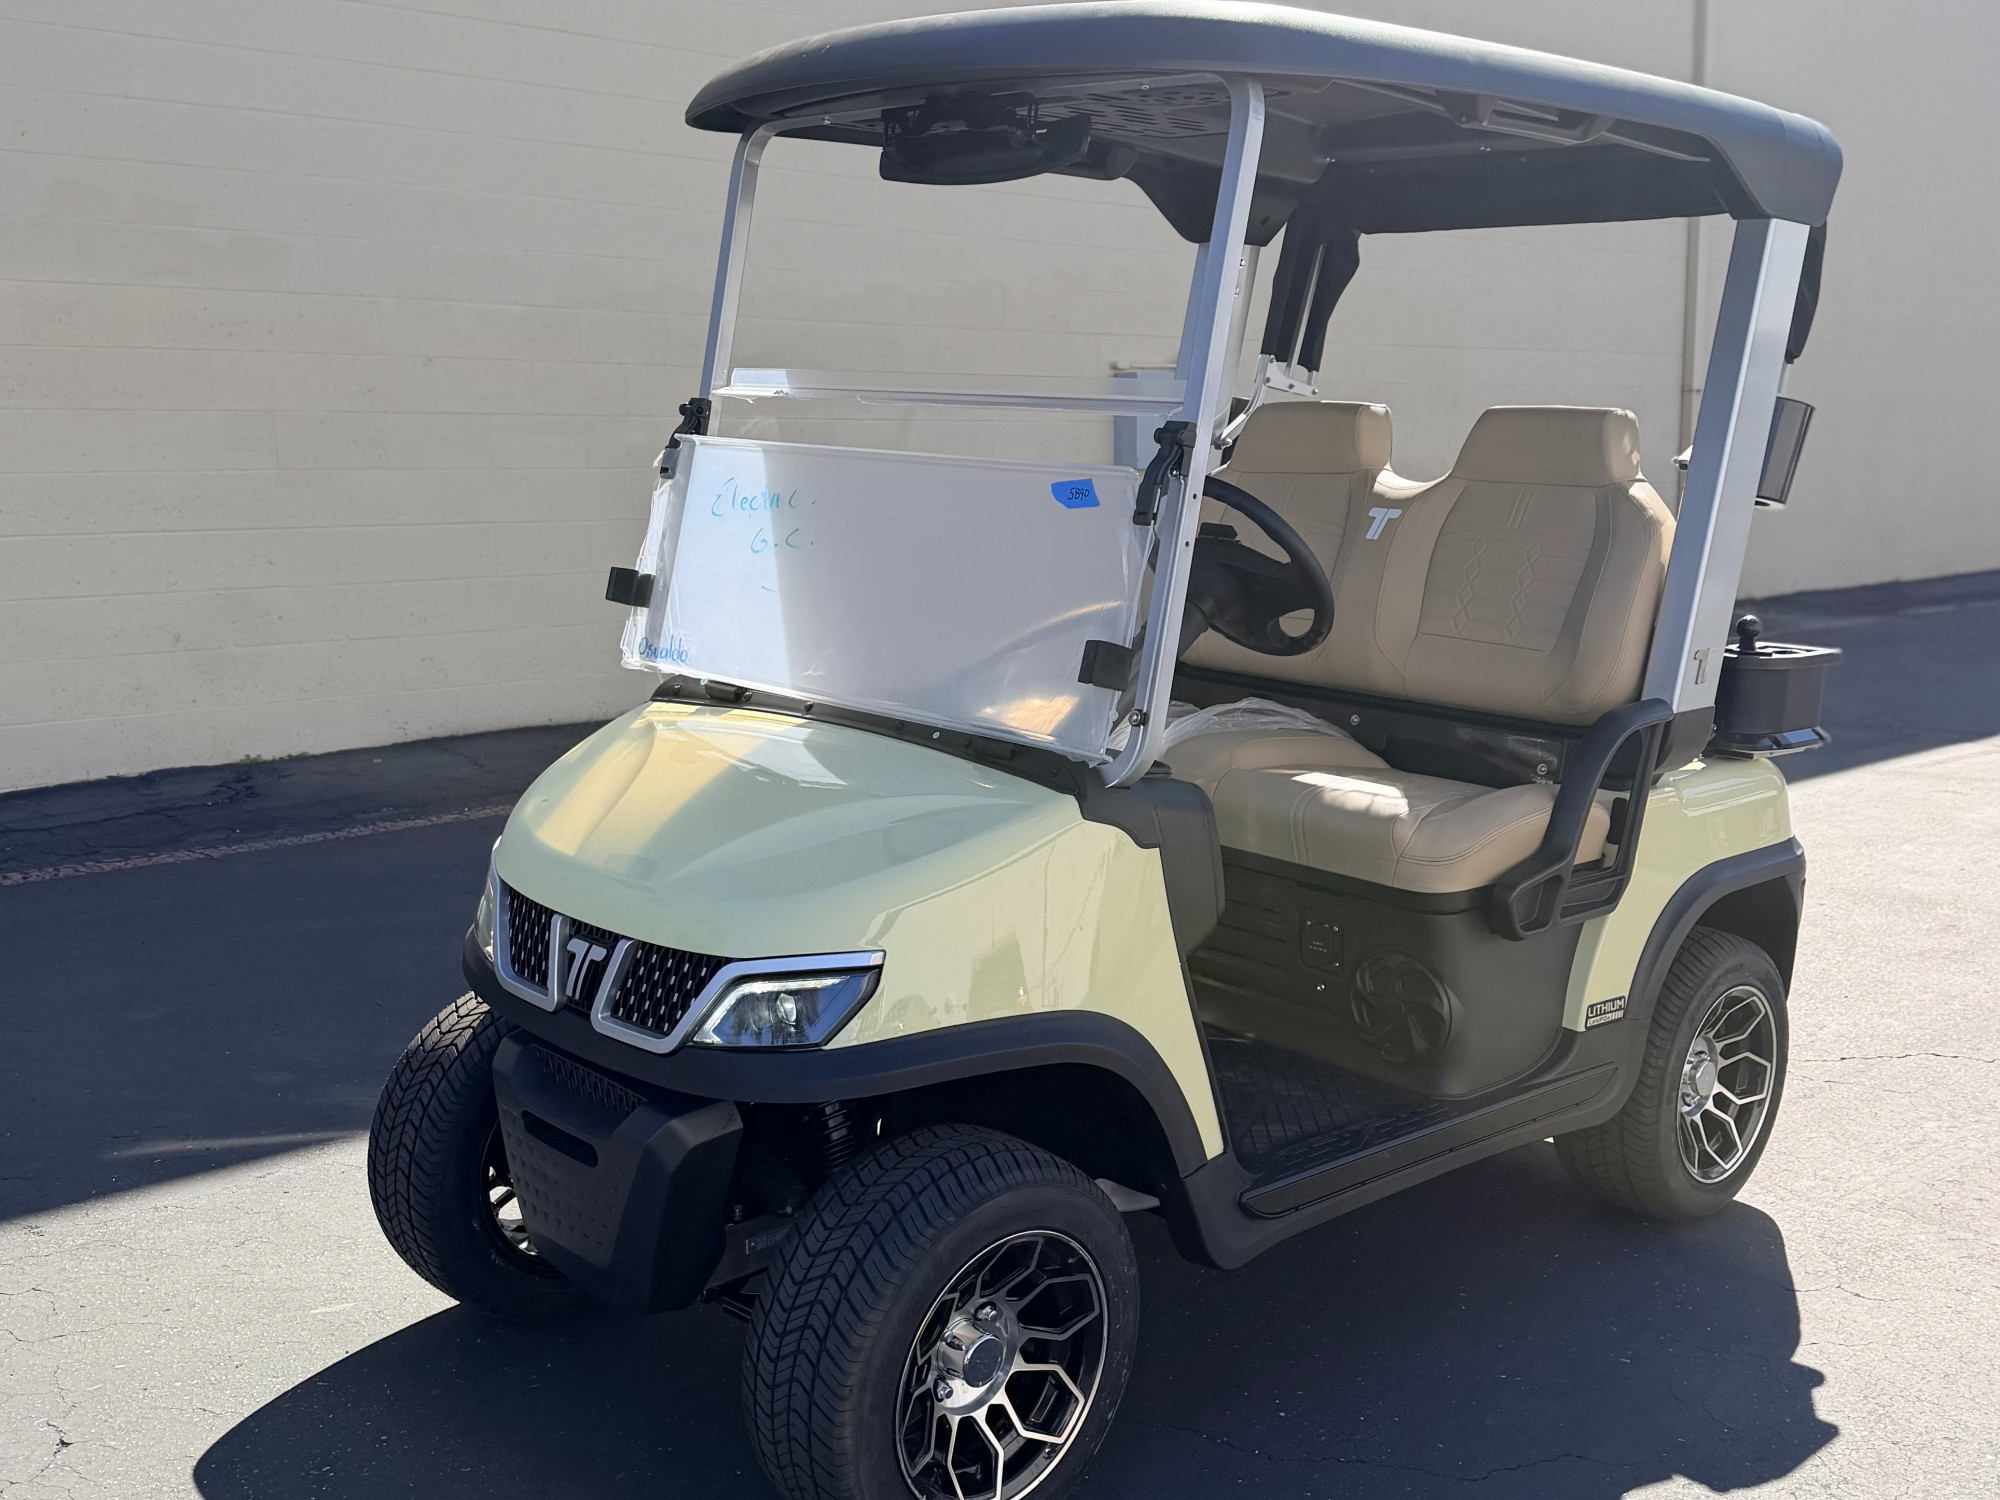
How to Install a Tara Golf Cart Windshield
Park the cart safely, test-fit the windshield, install the rubber or aluminum mounting extrusions, align it between the front roof supports, tighten the hardware evenly, and check that the folding section opens without binding.
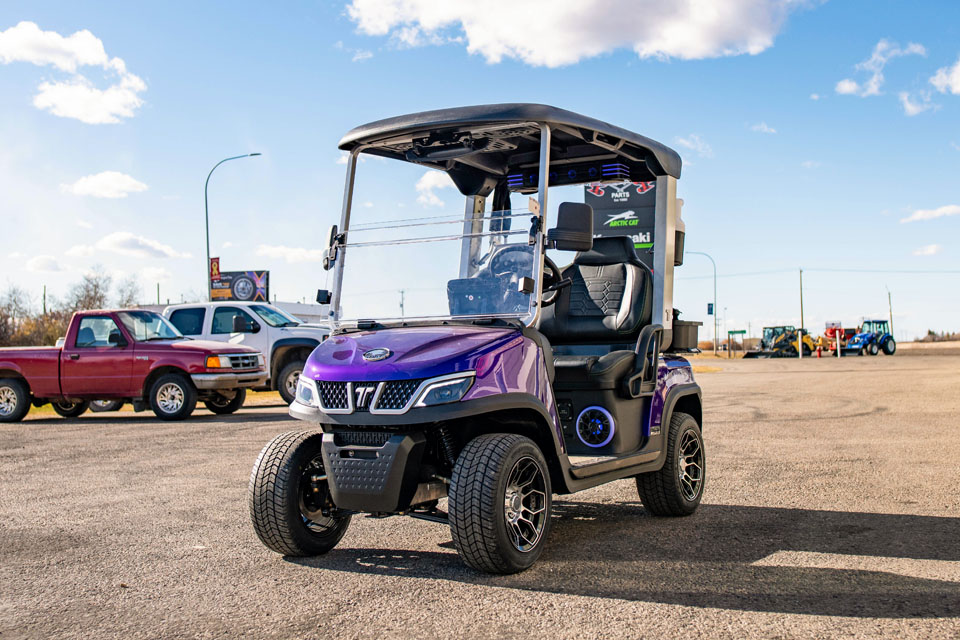
A properly installed windshield helps protect passengers from wind, insects, light rain, dust, and flying debris. Most replacement windshields are designed as model-specific kits that attach to the cart’s front roof supports using brackets, clamps, rubber channels, or mounting extrusions.
The job is manageable for many owners, but the windshield must match the exact cart model and frame. Before ordering parts for a Tara golf cart, confirm the model, year, roof-support dimensions, windshield style, and included hardware.
Tools Needed for Windshield Installation
Most Tara windshield installations require only basic hand tools. The exact tools depend on whether the kit uses bolts, clamps, screws, snap channels, or preinstalled brackets.
| Tool or Material | Purpose |
|---|---|
| Socket and wrench set | Tightens mounting bolts and support brackets |
| Phillips screwdriver | Installs screws and small retaining hardware |
| Low-speed drill or driver | Speeds installation when approved by the kit instructions |
| Rubber mallet | Seats rubber channels or extrusions without cracking the windshield |
| Microfiber cloth | Protects and cleans the windshield surface |
| Masking tape | Marks alignment points and protects painted surfaces |
| Plastic trim tool | Helps position rubber seals without scratching the windshield |
Do not use an impact wrench or high-torque drill setting. Over-tightening can crack acrylic or polycarbonate, distort the brackets, or damage the cart’s roof supports.
Before You Begin
Inspect the windshield kit before removing protective film. Confirm that the package includes the correct upper and lower panels, mounting channels, brackets, rubber spacers, straps, fasteners, and instructions.
Compare the windshield width with the cart’s front roof supports. The edges should align without forcing the panel inward or outward.
Also inspect the windshield for:
- Cracks or chips
- Deep scratches
- Warped edges
- Missing mounting holes
- Damaged hinges
- Incorrect bracket spacing
- Missing hardware
Tara Golf Cart Windshield Installation Steps
- Park and prepare the cart. Place the cart on level ground, apply the parking brake, switch it off, and remove the key.
- Test-fit the windshield. Position the panel between the front roof supports and confirm proper width and height.
- Protect the cart. Cover painted body panels and the dashboard with towels or protective material.
- Expose only the edges. Peel back a small portion of the protective film near the mounting areas.
- Attach the extrusions. Install the supplied rubber channels, aluminum extrusions, or edge retainers.
- Mount the windshield. Place the panel against the roof supports and align the brackets or clamps.
- Secure the hardware. Tighten fasteners gradually and evenly on both sides.
- Check the folding section. Confirm that it opens, closes, and latches without contacting the roof or dashboard.
- Complete final adjustments. Center the panel, verify clearances, and finish tightening by hand.
- Remove the protective film. Peel it away only after the installation is complete.
1. Preparation
Test Fit
Before installing any brackets, hold the windshield in its intended position. A second person can help support the opposite side while you check alignment.
The windshield should sit evenly between the roof supports. Confirm that the lower panel does not press against the dashboard and that the upper panel does not interfere with the roof.
Protect the Cart
Place clean towels over the dashboard, hood, and front bodywork. Acrylic and polycarbonate windshields can scratch easily if placed against metal, concrete, or dirty surfaces.
Avoid resting the windshield on its corners. Store it flat on a clean padded surface until you are ready to mount it.
Unwrap the Edges
Most replacement windshields have protective film on both sides. Leave most of this film in place during installation, but peel it back approximately one or two inches around the edges and mounting holes.
This prevents the film from becoming trapped under clamps, screws, hinges, or rubber channels.
2. Attach the Extrusions
Some windshield kits use rubber or aluminum extrusions along the vertical edges. These parts help grip the panel, reduce vibration, and create a finished mounting surface.
Align each extrusion carefully before pressing it into place. If the fit is tight, use a rubber mallet and light taps. Never strike the windshield directly with a metal hammer.
Make sure the extrusion is fully seated from top to bottom. An uneven channel can twist the windshield and cause the folding section to bind.
Do not use petroleum grease unless the windshield manufacturer approves it. Some lubricants can attack rubber seals or cloud certain plastics.
3. Mount the Windshield to the Frame
Position the windshield against the front roof supports. Install the supplied clamps or brackets loosely at first so the panel can still move slightly for alignment.
Alternate between the left and right sides while installing hardware. This prevents one side from being pulled too tightly before the opposite side is aligned.
| Alignment Check | Correct Condition |
|---|---|
| Side spacing | Even gap on the left and right |
| Lower clearance | No hard contact with the dashboard or body |
| Upper clearance | Windshield does not press against the roof |
| Folding hinge | Straight and free from twisting |
| Mounting clamps | Fully seated on the roof supports |
4. Secure and Fasten the Windshield
Once the windshield is centered, tighten the hardware gradually. Use hand tools for the final tightening stage.
Acrylic and polycarbonate expand and contract with temperature. Fasteners should hold the windshield securely without crushing the panel or rubber spacers.
Watch for warning signs of over-tightening:
- Visible stress marks around a mounting hole
- Cracking or whitening in the plastic
- Distorted brackets
- Compressed rubber spacers
- A folding panel that no longer moves freely
- Windshield edges bending toward the frame
5. Final Adjustments
Open and close the folding windshield several times. The upper panel should move smoothly and remain secure in both the raised and lowered positions.
Check that straps, clips, snaps, or retaining brackets hold the panel correctly. The windshield should not shake excessively when the cart moves over a normal paved surface.
Turn the steering wheel fully in both directions and verify that no windshield hardware interferes with mirrors, wiring, the dashboard, or accessories.
After all checks are complete, remove the remaining protective film and clean the windshield with water and a plastic-safe cleaner.
Common Installation Mistakes
| Mistake | Possible Result |
|---|---|
| Ordering a generic windshield | Poor fit or incompatible brackets |
| Removing the film too early | Scratches during installation |
| Over-tightening fasteners | Cracks and stress marks |
| Mounting one side completely first | Uneven or twisted alignment |
| Using glass cleaner with ammonia | Clouding or damage to some plastic materials |
| Drilling without confirming clearance | Damage to wiring, supports, or body panels |
Should You Drill New Mounting Holes?
Avoid drilling into the cart or windshield unless the kit instructions specifically require it. Many model-specific windshields use existing roof-support locations or clamp around the frame.
Drilling incorrectly may damage electrical wiring, weaken a roof support, create sharp edges, or crack the windshield. If holes do not align, stop and verify that the windshield is the correct model.
Owners of a Tara golf cart should confirm the windshield part number with a dealer before modifying any frame component.
How to Clean a New Golf Cart Windshield
Use clean water, mild soap, and a soft microfiber cloth. Rinse dirt away before wiping so abrasive particles do not scratch the surface.
Avoid using:
- Ammonia-based glass cleaners
- Dry paper towels
- Abrasive pads
- Gasoline or strong solvents
- Scrapers or razor blades
- High-pressure water directly at hinges and seals
Use only products labeled safe for acrylic or polycarbonate. Clean both sides regularly to maintain visibility.
How Much Does It Cost to Replace a Golf Cart Windshield?
Replacement cost depends on the windshield material, folding design, tint, model compatibility, shipping, and labor. A basic flat or folding plastic windshield generally costs less than a premium tinted or DOT-style assembly.
| Replacement Item | Typical Planning Range |
|---|---|
| Basic replacement windshield | Approximately $100–$200 |
| Model-specific folding windshield | Approximately $150–$300 |
| Premium tinted or upgraded windshield | Approximately $250–$500+ |
| Professional installation labor | Approximately $50–$150 |
| Hardware or bracket kit | Approximately $20–$75 |
These are general budgeting ranges. Freight, dealer preparation, regional labor rates, replacement roof supports, mirrors, wipers, or damaged mounting hardware may increase the final cost.
When Should You Replace the Windshield?
Replace the windshield when it has damage that affects visibility, stability, or safe operation.
- Cracks extending from mounting holes
- Deep scratches in the operator’s field of view
- Clouding that cannot be cleaned
- Broken folding hinges
- Loose or missing mounting points
- Severe warping
- Sharp damaged edges
- A panel that will not remain secured
A cracked windshield should not be repaired with ordinary household glue. Adhesives may cloud the plastic, fail in sunlight, or create a weak area that breaks during travel.
DIY Installation vs. Dealer Installation
| Option | Advantages | Best For |
|---|---|---|
| DIY installation | Lower labor cost and fast completion | Owners with the correct kit and basic tools |
| Dealer installation | Professional fit and model verification | Complex windshields or uncertain compatibility |
| Mobile technician | Convenient on-site installation | Fleet, resort, or commercial operators |
Professional installation is recommended when the roof supports are bent, mounting holes are damaged, electrical accessories must be relocated, or the new windshield includes wipers or powered components.
Final Answer
Installing a Tara windshield usually takes 20 to 30 minutes. Begin by parking the cart safely, checking the kit, test-fitting the panel, and protecting painted surfaces.
Install the rubber or aluminum extrusions, align the windshield between the roof supports, attach the clamps or brackets loosely, and then tighten both sides evenly. Do not over-tighten the fasteners or remove the full protective film until installation is complete.
A replacement windshield may cost approximately $100 to $500 or more, depending on the material, design, tint, and model. Professional installation can add around $50 to $150.
For the best fit, purchase a model-specific replacement and confirm compatibility with an authorized dealer before installing it on your Tara golf cart.

Add a review
Your email address will not be published. Required fields are marked *