
How to Wire Three 12V Batteries for a 36V Golf Cart (Step-by-Step & Safety)
Wire three 12V batteries in series to create a dependable 36V pack for your golf cart. This concise guide covers wiring steps, tools, safety checks, and pro tips.
Quick answer
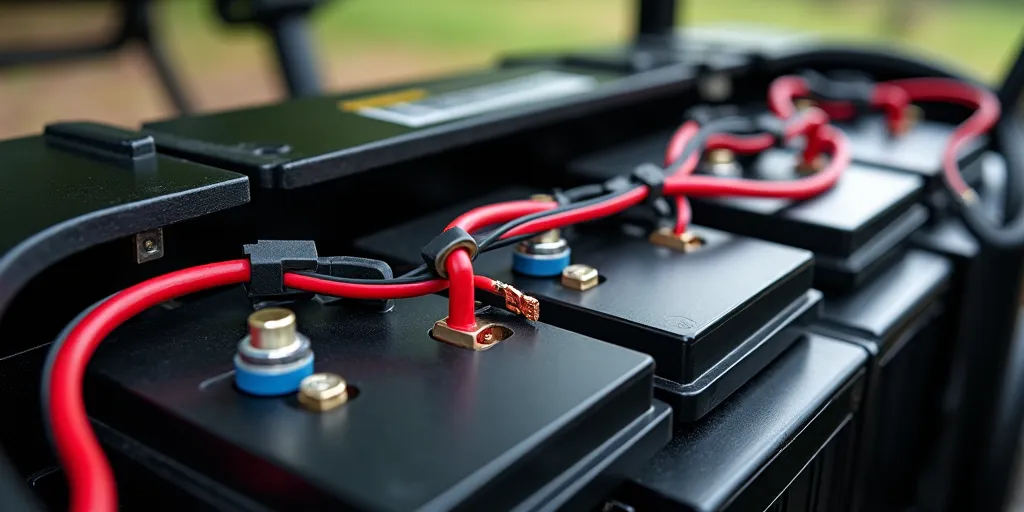
To wire three 12V batteries for a 36V system, connect them in series: join the positive of Battery 1 to the negative of Battery 2, and the positive of Battery 2 to the negative of Battery 3. The remaining free posts are your 36V outputs: Battery 1 (−) is pack negative and Battery 3 (+) is pack positive. Use batteries with the same voltage and capacity (ideally same brand, age, and chemistry).
What you’ll need
- Three matching 12V batteries (lead-acid, AGM, or lithium—same chemistry/capacity).
- Series jumpers and main cables (follow the cart manufacturer’s gauge; many use 4 AWG or 2 AWG).
- Quality copper lugs, heat-shrink, terminal boots, and a proper crimping tool.
- Main fuse or breaker near pack positive sized for your controller/solenoid.
- Multimeter, zip ties, battery hold-downs, corrosion inhibitor, and PPE (gloves/eye protection).
Step-by-step wiring guide
- Plan the layout. Arrange the three batteries so jumpers are short, direct, and free from sharp bends. Label them B1, B2, and B3 left to right.
- Power down safely. Remove the key, open any master switch, and disconnect the old pack negative first, then positive.
- Prep terminals. Clean posts and lugs until bright metal; pre-crimp lugs and slide heat-shrink onto cables before crimping.
- Make the series links.
- Connect B1 (+) → B2 (−).
- Connect B2 (+) → B3 (−).
Now only B1 (−) and B3 (+) remain free; these become your 36V outputs.
- Install the main fuse/breaker. Mount it within a few inches of B3 (+) to protect the entire system from shorts.
- Connect the cart leads.
- Cart/controller positive → fuse/breaker → B3 (+).
- Cart/controller negative → B1 (−).
Route cables away from sharp edges, heat, and moving parts; secure with clamps or zip ties.
- Verify with a multimeter. Measure across B1 (−) and B3 (+); you should see ~36V (fully charged lead-acid may read ~37–38V at rest).
- Finish & secure. Fit terminal covers, apply corrosion inhibitor to lead posts, torque lugs to spec, and lock down the battery hold-downs.
- Test run. With wheels off the ground, power up, listen for anomalies, and recheck for warm cables after a brief throttle test.
Important considerations
- Match batteries. Mixing ages, capacities, or chemistries creates imbalance; the weakest unit limits the pack and fails early.
- Cable gauge matters. Undersized or oxidized cables waste power and overheat; use quality copper and tight, clean terminations.
- Protection is essential. A correctly sized main fuse/breaker near B3 (+) is your last line of defense—never omit it.
- Charging. Use a 36V charger that matches your chemistry. Lead-acid may need periodic equalization; lithium requires a compatible BMS/charger.
- Balancing. Lead-acid packs benefit from occasional individual top-off charging; lithium relies on BMS balancing.
- Ventilation & safety. Lead-acid can vent hydrogen; keep the compartment ventilated and avoid sparks or open flames.
- Maintenance routine. Monthly: check torque, cleanliness, cable integrity, and (for flooded lead-acid) electrolyte levels with distilled water.
- Polarity discipline. Double-check every jumper path before attaching the cart leads. Reverse polarity can instantly damage the controller.
Series vs. parallel (why series is required)
Series wiring adds voltage while preserving amp-hours. Three 12V, 100Ah batteries in series yield a 36V, 100Ah pack—exactly what a 36V cart needs. Parallel wiring would keep 12V but raise Ah, which won’t power a 36V system.
Troubleshooting tips
- No or low voltage: Confirm the two series jumpers are correct; measure each battery (~12–13V). A dead unit drags down the whole pack.
- Jerky motion or dropouts: Check for loose lugs or a weak battery under load. Observe voltage sag while accelerating.
- Uneven charge: Verify charger profile and connectors; balance charge or replace mismatched batteries.
- Hot cables: Indicates loose connections, corrosion, or too-small gauge. Fix immediately.
At-a-glance schematic (text)
B1 (–) —— pack negative to cart
B1 (+) —— jumper —— B2 (–)
B2 (+) —— jumper —— B3 (–)
B3 (+) —— fuse/breaker —— pack positive to cart
Final checklist
- All three batteries are identical in voltage, chemistry, capacity, and similar age.
- Series links: B1(+)→B2(−), B2(+)→B3(−); pack outputs: B1(−) and B3(+).
- Main fuse/breaker close to B3(+); correct-gauge cables; neat, secure routing.
- Measured ~36V across B1(−) and B3(+); charger matches 36V and chemistry.
- Terminals covered, pack restrained, compartment ventilated; first run tested safely.
Bottom line
Wiring three 12V batteries in series is straightforward: make two short jumpers to form the chain, connect the cart leads to B1(−) and B3(+), and protect the system with a main fuse. With matched batteries, proper cable gauge, and a compatible 36V charger, your 36V golf cart will run efficiently and reliably.


Add a review
Your email address will not be published. Required fields are marked *