
How to Disconnect the Back-Up Alarm on an EZGO Golf Cart
If the back-up alarm on your EZGO golf cart is becoming annoying or unnecessary, disconnecting it is a simple process. In this article, we’ll walk you through the steps to disconnect the back-up alarm on your EZGO golf cart. You’ll also learn about some important safety precautions and considerations to keep in mind.
Why Disconnect the Back-Up Alarm?
The back-up alarm is an important safety feature that alerts pedestrians and nearby individuals when the golf cart is reversing. However, there may be situations where the noise is unnecessary or unwanted, especially in quiet environments like private golf courses or residential areas. Disconnecting the alarm can eliminate this noise, but it’s important to understand the implications and potential risks.
Steps to Disconnect the Back-Up Alarm on an EZGO Golf Cart
Here’s how to disconnect the back-up alarm on your EZGO golf cart:
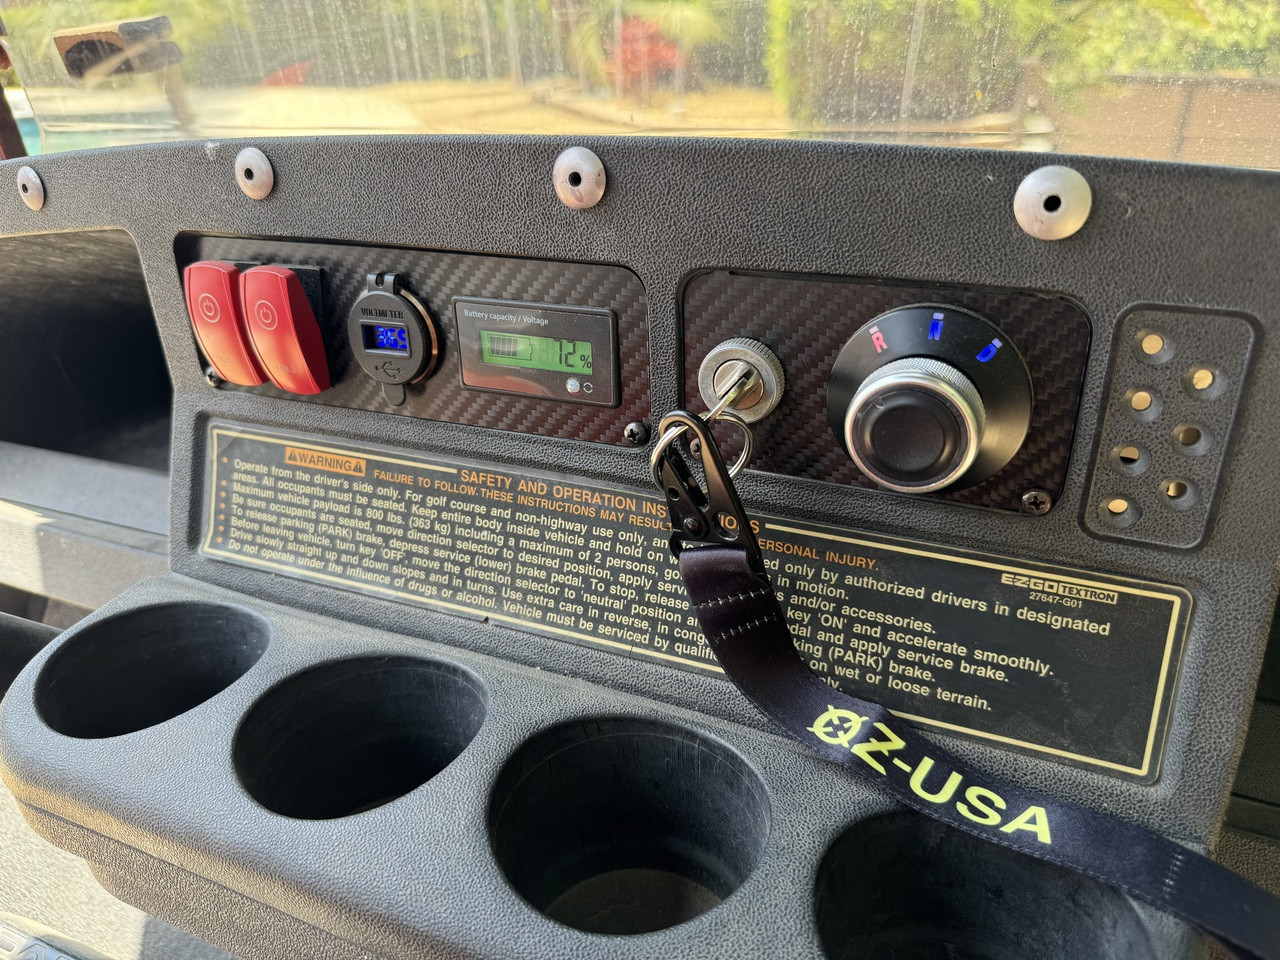
Step 1: Find the Back-Up Alarm (Buzzer)
The first step is to locate the back-up alarm (also called the buzzer). On most EZGO golf carts, this buzzer is located behind the dashboard near the key switch. If you're having trouble finding it, refer to your owner's manual for specific guidance based on your model.
Step 2: Access the Buzzer
Once you’ve located the back-up alarm, you need to access it. In many cases, you’ll need to remove part of the dashboard or other components around the key switch to get to the buzzer. This may require unscrewing or unclipping panels. Be careful not to damage any wires or parts while doing this.
Step 3: Disconnect the Wires
Once the buzzer is accessible, you can disconnect the wires. The back-up alarm typically has two wires: a positive and a negative wire. You will need to disconnect these wires to disable the alarm. Use a wrench or pliers to carefully remove the connectors from the terminals. If you’re unsure about which wire to disconnect, consult your golf cart's manual to ensure you’re working with the correct wires.
Step 4: Reassemble the Dashboard
After disconnecting the wires, reassemble the dashboard or any components you had to remove to access the buzzer. Make sure all screws and clips are securely fastened to ensure the cart's interior is intact and safe to use. Take extra care to avoid leaving any exposed wires or components that might cause damage or a short circuit.
Important Considerations and Safety Tips
While disconnecting the back-up alarm on your EZGO golf cart is relatively simple, there are some important safety considerations to keep in mind:
- Safety First: Always ensure that the golf cart is powered off and the key is removed before performing any electrical work. This will help prevent accidental shocks or short circuits.
- Check the Manual: The location and process for disconnecting the back-up alarm may vary depending on the specific model of your EZGO golf cart. Always consult your owner’s manual to ensure you’re following the correct procedure.
- Consider the Implications: Disconnecting the back-up alarm removes an important safety feature. Be mindful of the potential risks involved, particularly when reversing the golf cart in areas with pedestrians or other vehicles.
- Alternatives: If you don’t want to completely disconnect the alarm but still want a quieter experience, consider replacing the alarm with a less noisy version or adjusting the volume if the option is available.
What if I Want to Reconnect the Back-Up Alarm Later?
If you ever decide to reconnect the back-up alarm, it’s simply a matter of reversing the disconnection process. Reattach the wires to the back-up alarm’s terminals and reassemble the dashboard. Test the alarm to ensure it’s working properly. If you’re not comfortable reconnecting the alarm, consider seeking assistance from a professional.
Conclusion
Disconnecting the back-up alarm on your EZGO golf cart is a straightforward process that can help reduce unwanted noise. However, it’s important to weigh the benefits of a quieter cart with the safety implications of disabling a key alert system. Always take necessary precautions and consult your owner’s manual for specific instructions.

Add a review
Your email address will not be published. Required fields are marked *