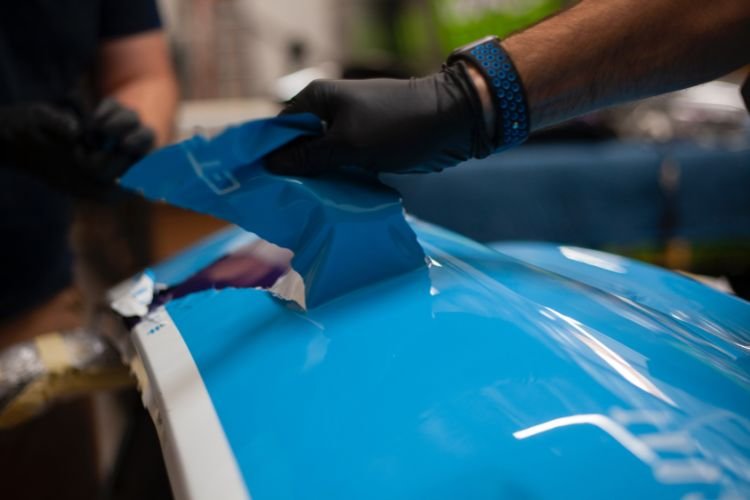
How to Restore ATV Plastics: A Step-by-Step Guide
Restoring ATV plastics is an essential part of maintaining the look and longevity of your vehicle. Over time, ATV plastics can become faded, scratched, or damaged due to exposure to the elements and rough terrain. Fortunately, you can restore these plastics using a combination of cleaning, heat treatment, and protective coatings.
Why Restore ATV Plastics?
ATV plastics are exposed to harsh conditions such as dirt, mud, UV rays, and rough terrain. Over time, this can cause fading, scratches, and dullness, making your ATV look worn out. Restoring the plastics not only improves the vehicle's appearance but also helps protect the materials from further damage. With the right techniques and products, you can extend the life of your ATV plastics and keep your ride looking as good as new.
Step 1: Clean the Plastics Thoroughly
The first and most important step in restoring your ATV plastics is to clean them thoroughly. Dirt, grime, and oil buildup can make it difficult to restore the plastic’s color and appearance. Here's how to clean your ATV plastics effectively:
- Use Soap and Water: For general cleaning, use soap and warm water to wash the plastic surfaces. Use a soft sponge or cloth to avoid scratching the plastic.
- Plastic Cleaner: For more stubborn dirt and grime, consider using a dedicated plastic cleaner. These cleaners are specially formulated to break down oil, dirt, and other contaminants without damaging the plastic.
- Dry the Plastics: After cleaning, dry the plastic completely with a clean cloth or towel to ensure no water is left behind that could affect the restoration process.
Step 2: Heat Treatment for Scratches and Fading
Heat treatment is one of the most effective methods for restoring ATV plastics, especially if they are scratched or severely faded. The heat helps to soften the plastic, allowing it to return to its original form and shine. Here's how to use heat treatment on your ATV plastics:
- Use a Heat Gun: A heat gun is the best tool for this step. Set the heat gun to a low or medium setting. Hold it a few inches away from the plastic surface and gently move it over the faded or scratched areas. Be sure to avoid concentrating the heat on one spot for too long to prevent damage.
- Watch for Changes: As you apply heat, you’ll begin to see the plastic soften and regain its original shape and shine. Be careful not to overheat the plastic, as this can cause it to deform.
- Work in Small Sections: Work in small sections at a time to ensure that the plastic is heated evenly and effectively.
Step 3: Restore Color with Boiled Linseed Oil and Paint Thinner
If your ATV plastics are only mildly faded and not severely scratched, you can restore their color using a mixture of boiled linseed oil and paint thinner. This method is particularly effective for light fading and will bring back the original shine and luster. Here's the process:
- Prepare the Mixture: Mix 40% boiled linseed oil and 60% paint thinner. Stir the mixture thoroughly until the consistency is smooth and even.
- Apply the Mixture: Using a clean cloth, apply the linseed oil and paint thinner mixture to the plastic surfaces. Rub the mixture into the plastic in a circular motion, making sure to cover the entire area evenly.
- Let It Set: Allow the mixture to sit for about 10–15 minutes. This will give it time to penetrate the plastic and restore the color.
- Wipe Away Excess: After the mixture has set, use a clean, dry cloth to wipe away any excess oil and paint thinner. This will leave the plastic looking shiny and refreshed.
Step 4: Apply a Protective Coating
After restoring your ATV plastics, it’s essential to protect them from future damage. A good protective coating will keep the plastics looking new for longer and shield them from UV rays, dirt, and moisture. Here's how to apply a protective coating:
- UV Protection Spray: Use a UV protection spray specifically designed for plastics. This spray will help prevent fading and cracking caused by prolonged sun exposure.
- Wax or Plastic Sealant: Applying a layer of wax or plastic sealant to the plastics will provide an additional layer of protection from dirt, water, and other debris. This will also help maintain the shine and color of the plastics over time.
- Apply Evenly: Spray or apply the protective coating evenly to all surfaces, including any crevices or hard-to-reach areas. Allow the coating to dry completely before using your ATV.
Step 5: Additional Tips for ATV Plastic Restoration
- Avoid Harsh Chemicals: When cleaning or restoring your ATV plastics, avoid using harsh chemicals like bleach or solvents that can damage the plastic material.
- Regular Maintenance: To keep your ATV plastics looking good for longer, clean and protect them regularly. This will prevent buildup and protect the surface from fading and scratches.
- Storage: When not in use, store your ATV in a shaded or covered area to reduce sun exposure and prevent UV damage to the plastics.
Conclusion
Restoring ATV plastics is a simple yet effective way to enhance the appearance and longevity of your vehicle. By following the steps of cleaning, heat treatment, restoring color, and applying a protective coating, you can bring your ATV plastics back to life and keep them looking new. Remember, regular maintenance and protection are key to preserving the look and performance of your ATV over time.

Add a review
Your email address will not be published. Required fields are marked *