
How to Test a Golf Cart Battery Charger with a Multimeter
Testing your golf cart battery charger with a multimeter is a quick and easy way to determine whether your charger is working correctly. If your golf cart isn’t charging properly, this method can help identify the issue before you need to replace the charger. In this article, we’ll walk you through the steps to test a golf cart battery charger using a multimeter, ensuring that you can keep your battery in top condition for longer.
Why Test Your Golf Cart Battery Charger?
A properly functioning battery charger is crucial for maintaining your golf cart’s performance. If your charger is malfunctioning, your battery may not charge fully, which can lead to poor performance and shortened battery life. Using a multimeter to test the charger can help you diagnose whether it’s providing the correct output voltage. This is especially useful if your golf cart seems to be underperforming or if the battery isn’t holding a charge.
Tools You Will Need
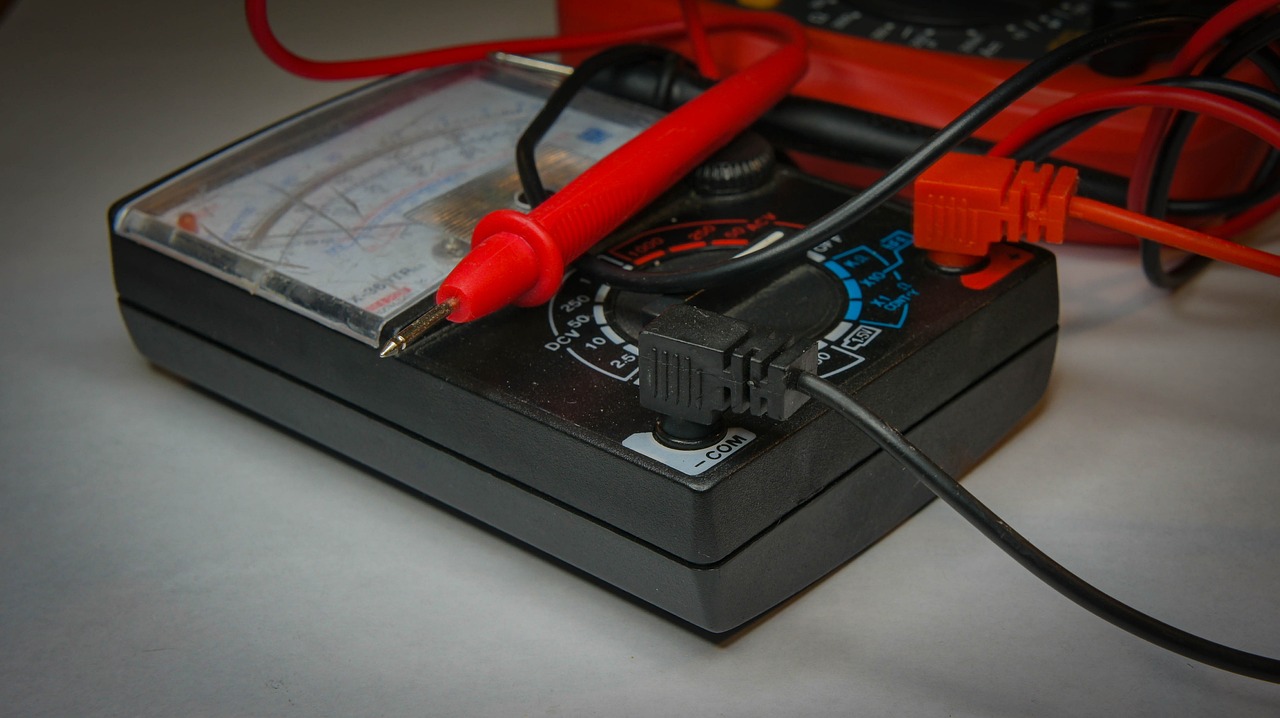
- Multimeter: A multimeter is an essential tool for measuring voltage. Set it to the DC voltage setting for testing your golf cart charger.
- Golf Cart Battery Charger: Make sure the charger is plugged in and properly connected to your golf cart’s battery.
- Safety Gear: It’s a good idea to wear gloves and safety glasses when working with electrical components to protect yourself from potential shocks or sparks.
Step-by-Step Guide to Test a Golf Cart Battery Charger with a Multimeter
Testing a golf cart battery charger is a straightforward process. Follow these steps to check the charger’s output voltage and compare it with the expected value for your charger:
Step 1: Prepare the Multimeter
Before starting the test, ensure that the multimeter is set to measure DC (direct current) voltage. This is because a golf cart battery operates on DC power, and you want to ensure the charger is outputting the correct DC voltage.
- Turn the multimeter dial to the DC voltage setting.
- Ensure that the multimeter is in the correct range to measure the voltage of the charger’s output (typically between 12-48V for most golf cart chargers).
Step 2: Plug in and Turn on the Charger
Make sure the charger is properly connected to your golf cart’s battery. Plug the charger into an electrical outlet and turn it on. The charger should be supplying power to the battery, and you will be testing the output from the charger to the battery.
Step 3: Set the Multimeter Probes
Now it’s time to test the charger’s output. Attach the multimeter probes to the charger’s output terminals:
- Connect the red probe (positive) to the positive terminal of the charger’s output.
- Connect the black probe (negative) to the negative terminal of the charger’s output.
Step 4: Check the Voltage Reading
Once the probes are connected, look at the multimeter’s display. The multimeter will show the output voltage from the charger. Compare this reading with the expected output voltage for your specific charger. For example:
- A 36V golf cart charger typically outputs 36 volts.
- A 48V charger typically outputs 48 volts.
- If you have a 48V battery and the charger is only providing 36V, it’s a sign the charger isn’t working correctly.
Step 5: Compare the Voltage with the Manufacturer’s Specifications
The voltage reading from the multimeter should closely match the output voltage specified by the manufacturer for your charger. If the voltage is too low, it indicates that the charger is not working properly. If the voltage is much higher than expected, this could signal a faulty charger or potentially unsafe operating conditions.
- For a 36V system, the voltage should be between 36 and 42 volts during charging.
- For a 48V system, the voltage should be between 48 and 54 volts during charging.
Step 6: Monitor the Voltage During Charging
While the charger is connected and supplying power to the golf cart’s battery, keep an eye on the multimeter reading. The voltage should remain stable throughout the charging process. If the voltage fluctuates or decreases, it’s a sign that the charger may be malfunctioning. Additionally, ensure the charger reaches the expected voltage as the battery begins to charge. A malfunctioning charger may fail to reach the required voltage, meaning your battery will not charge fully.
How to Tell If a Golf Cart Battery Charger Is Bad?
If you’ve tested your golf cart battery charger and the voltage readings are outside the normal range, it may indicate a problem with the charger. Here are some common signs that your charger may be malfunctioning:
- Inconsistent Voltage: If the voltage fluctuates or is far lower than the specified output voltage, your charger might be faulty.
- No Voltage Output: If the charger does not produce any voltage when connected to the battery, the charger could be dead or malfunctioning.
- Excessive Heating: If the charger becomes excessively hot during operation, this could be a sign of internal failure.
- Battery Not Charging: If your golf cart battery isn’t charging or holding a charge despite the charger being plugged in, the charger may be malfunctioning or have an issue with the charging circuit.
Conclusion
Testing your golf cart battery charger with a multimeter is an effective way to ensure that it is working properly and providing the correct output voltage. By following the steps outlined in this guide, you can easily test your charger and troubleshoot any issues before they become major problems. If your charger isn’t functioning correctly, it may be time to replace it to ensure that your golf cart continues to perform at its best.


Add a review
Your email address will not be published. Required fields are marked *